STEP 01
View Purchased VPS
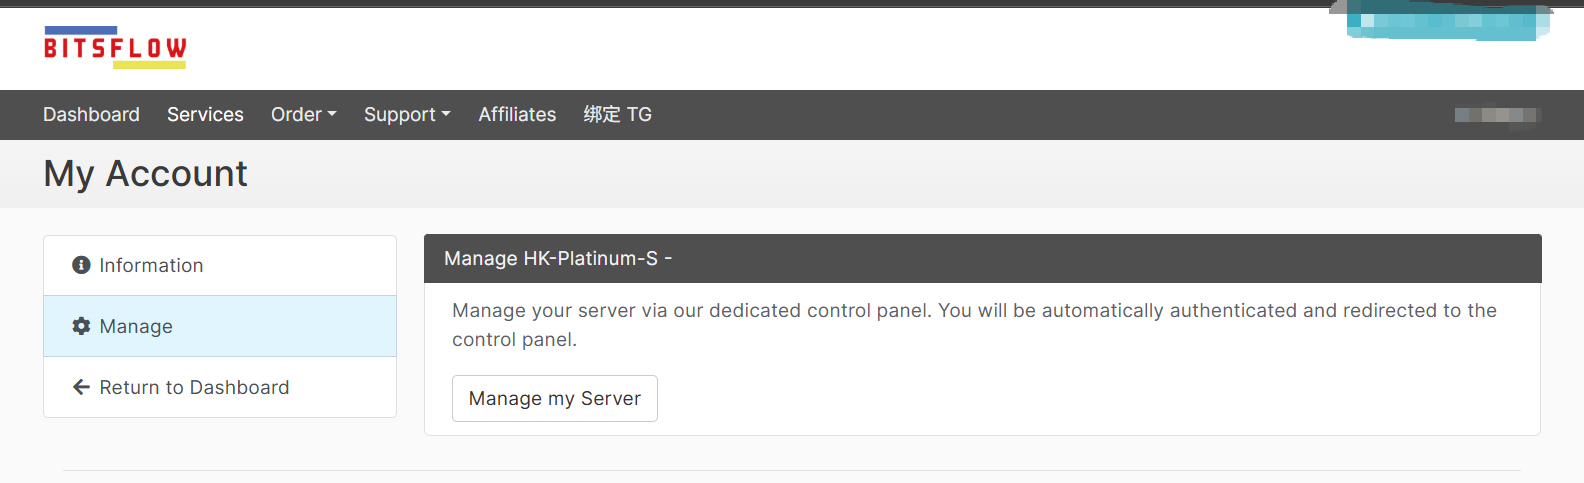
After purchase, view the purchased VPS through "Services - My Services" on the website, and click "Manage My Server".
购买后,通过网站上的“服务-我的服务”查看已购买的VPS,并点击“Manage My Server”
VPS 系统安装指南 / Step-by-Step Tutorial
After purchase, view the purchased VPS through "Services - My Services" on the website, and click "Manage My Server".
购买后,通过网站上的“服务-我的服务”查看已购买的VPS,并点击“Manage My Server”
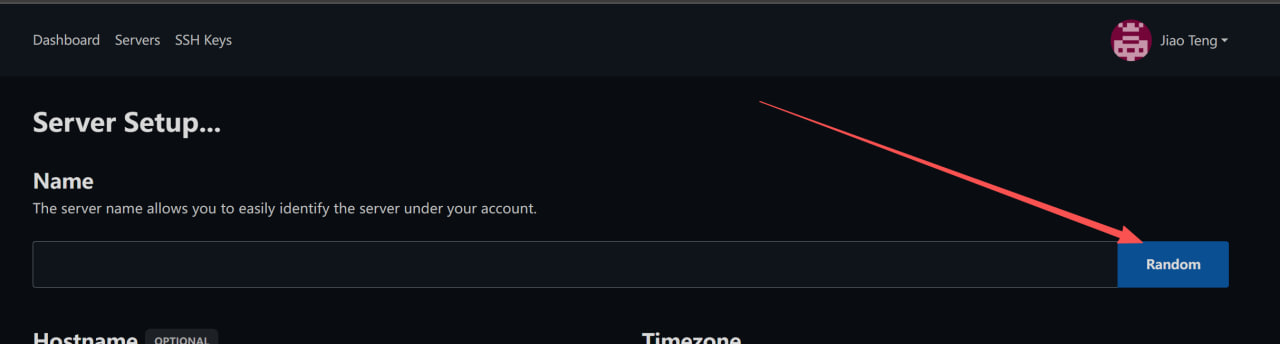
Click Random to generate a random hostname (customization is not recommended).
点击Random,随机生成一个主机名(不建议自定义)
Hostname can be left unset (recommended). TimeZone can be selected according to your actual situation (UTC+8:00 Asia/Shanghai is recommended), or it can be left as is.
Hostname(主机名)可以不设置(建议不设置),TimeZone(时区)可根据自己的实际情况选择(建议选择UTC+8:00 Asia/Shanghai),也可以不动。

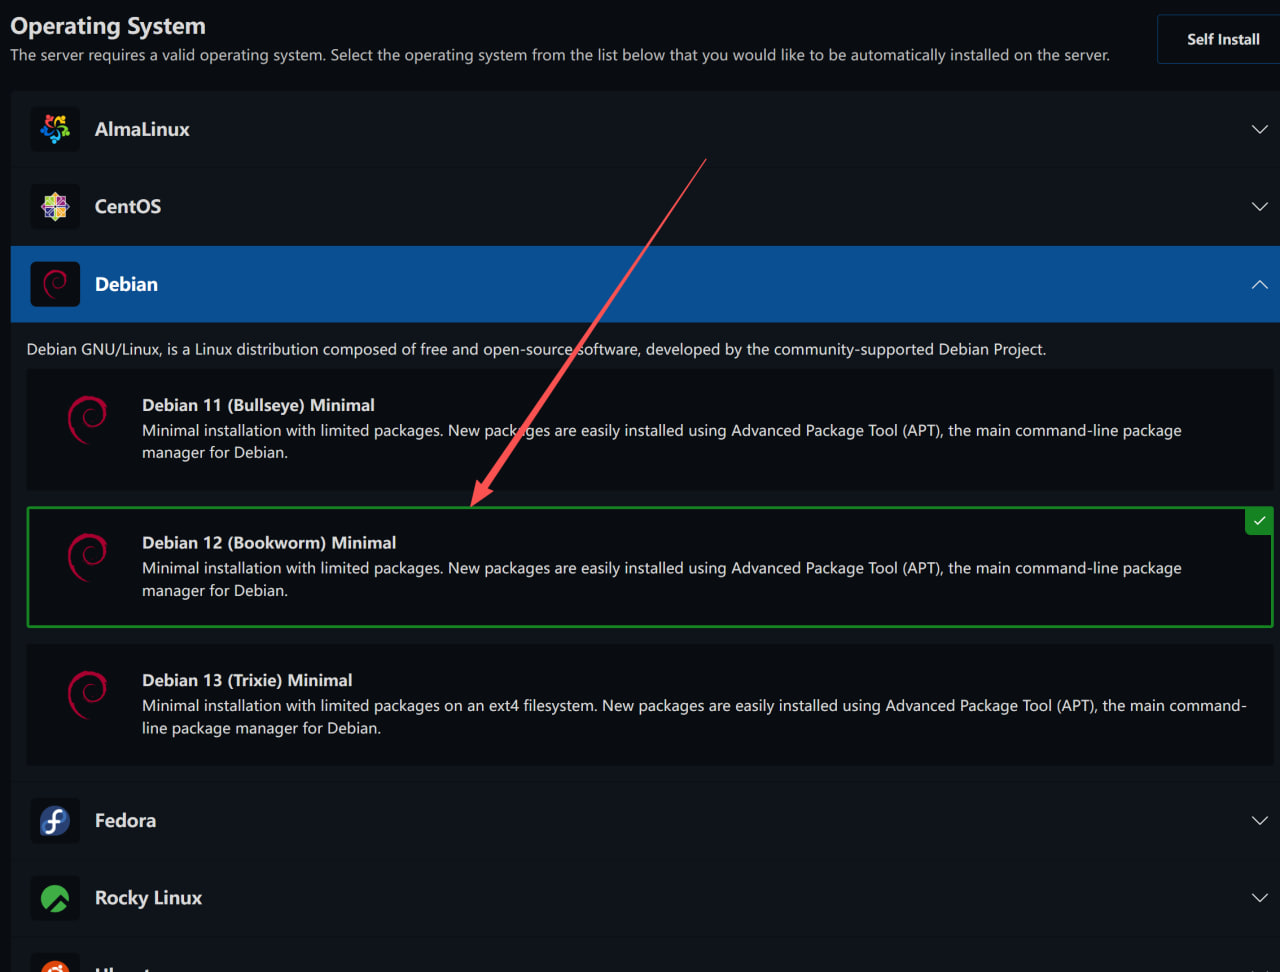
Select a system image below, such as Debian/Debian 12.
在下方选择一个系统镜像,比如Debian/Debian12
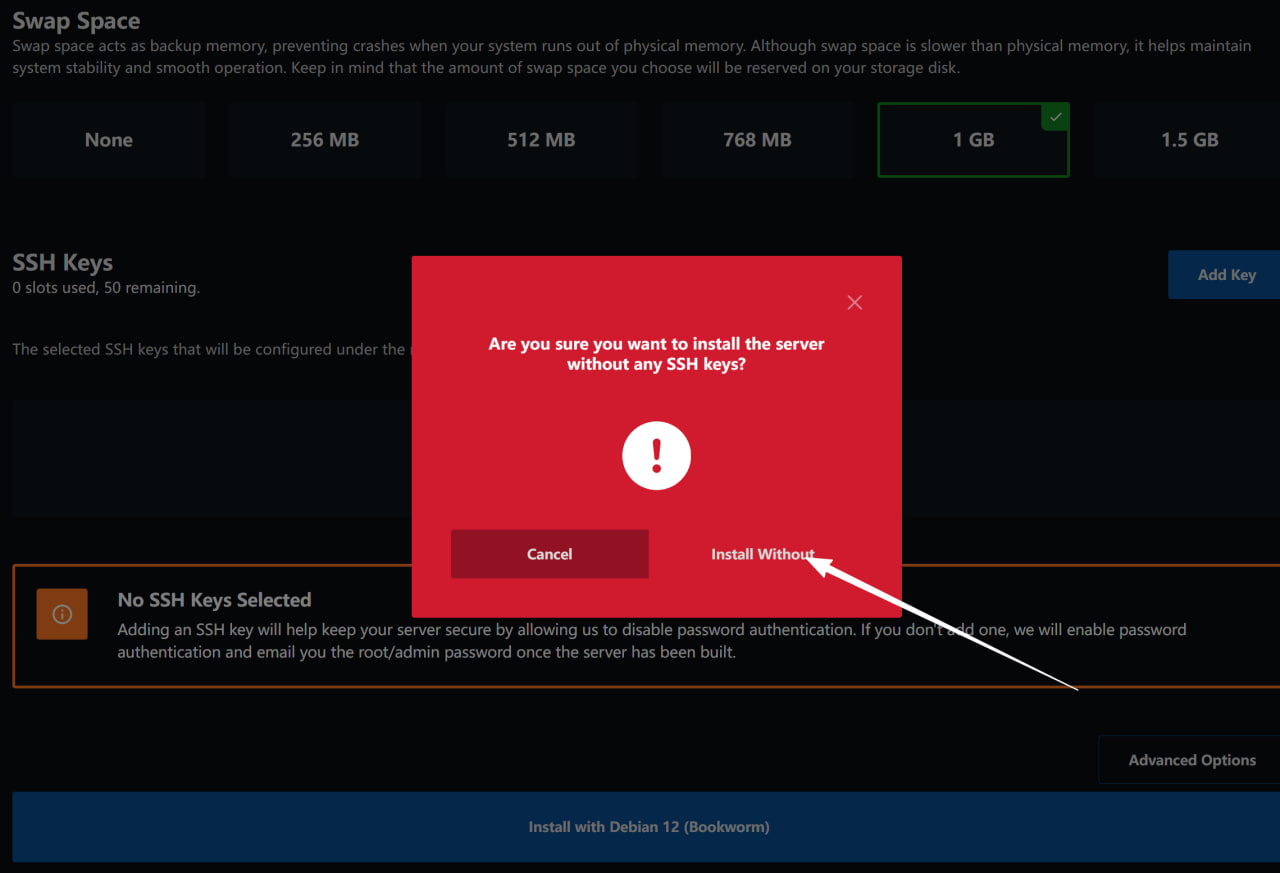
Swap Space can be selected according to your actual needs. It is recommended to choose 1G. If you know how to configure SWAP yourself, you can select None.
Swap Space(交换空间)可根据实际情况选择,建议选择1G。如果自己会配置SWAP,可以先选择None。

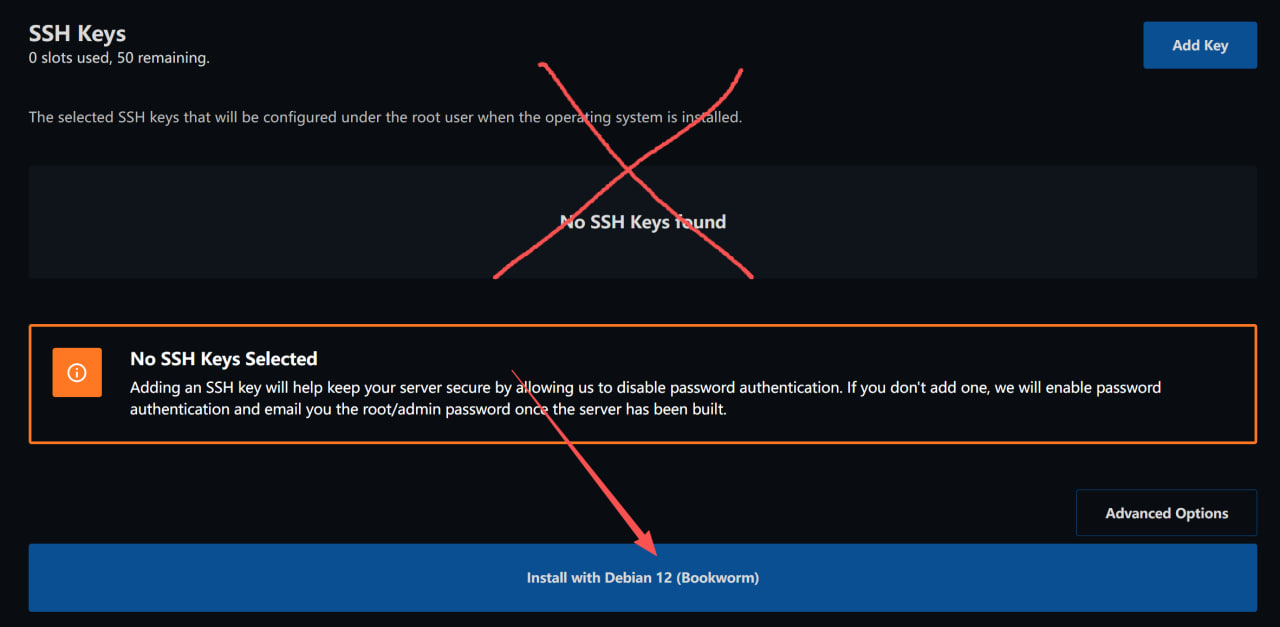
If you are unsure how to use SSH KEY, ignore this. If you configure it, save the downloaded private key.
如果您不知道SSH KEY如何连接,我们不建议您进行配置(忽略此行);如果您配置了,请妥善保存下载的公钥。

If you wish to log in using root password, ignore SSH KEY and click "Install ******" directly.
如果您希望通过root密码登录,请忽略SSH KEY,直接点击下方的”Install ******“。
Select "Install Without" in the prompt to begin installation.
在提示框选择“Install Without”即可,随后将开始进行系统安装。
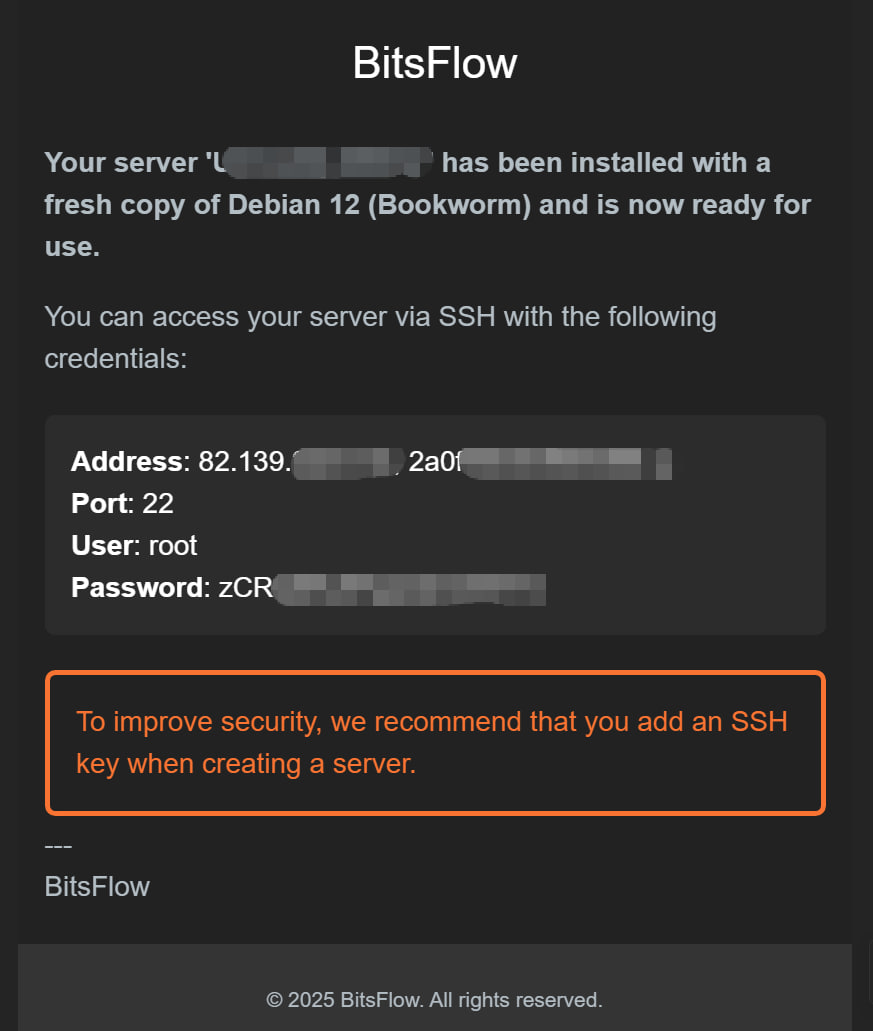
Wait for an email containing IP, port, and password. Check spam folder if not received.
稍等片刻后,您会收到包含IP/端口/密码的邮件。如未收到,请检查垃圾箱。